Browse hundreds of savory and sweet gourmet recipes from around the world! Go on a global culinary adventure today without ever leaving your kitchen.
Reader Favorites!
These are currently some of the most popular recipes on the site.
- Chicken Saag (Indian Chicken and Spinach Curry)
- Authentic Hawaiian Macaroni Salad (Mac Salad)
- Chocolat Chaud (French Hot Chocolate)
- Knedlíky (Czech Dumplings)
- Älplermagronen (Swiss Alpine Macaroni and Cheese)
- Classic Steak Tartare Recipe (Beef Tartare)
- Hovězí Guláš (Czech Beef Goulash)
- Trinidad Macaroni Pie


Latest and Greatest
Check out what's been cooking lately!


About Victoria
Hey! I'm Victoria, and I have been writing and sharing recipes on Mission Food Adventure since 2009. I love exploring the world, and recreating my favorite dishes in my own kitchen. Join me on my global culinary journey!
Search for any recipe
Find Recipes For...


See full Recipe Index →
Quick & Easy
Only have 30 minutes or less to create something delicious? Well these recipes are for you!
- Saimin (Hawaiian Noodle Soup)25 Minutes
- Authentic Bucatini Cacio e Pepe (Roman Cheese and Pepper Pasta)20 Minutes
- Nasi Goreng (Indonesian Fried Rice)15 Minutes
- Chinese Hot and Sour Soup Recipe20 Minutes


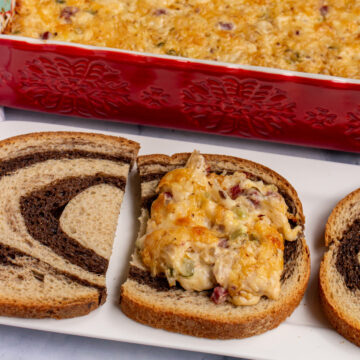
AppetizerS & SnackS
These recipes are perfect for all types of occasions from game day to game night, a big holiday dinner to a small gathering of friends.
- Bolivian Salteñas de Pollo (Golden Chicken, Potato, and Pea Empanadas)
- Zwiebelkuchen (German Onion Pie)
- Bitterballen (Dutch Fried Meatballs)
- Reuben Dip


Breakfast & brunch
From savory to sweet, these delicious breakfast and brunch recipes can't be beat!
- Galette Complète (Ham, Egg, and Cheese Buckwheat Crêpe)
- Cranberry Apple Scones with Cinnamon Glaze
- Gaufres de Lièges (Belgian Liège Waffles)
- Uitsmijter (Dutch Ham, Gouda and Egg Sandwich)


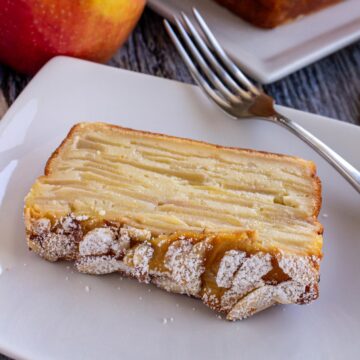
Desserts
Do you have a sweet tooth? This enticing collection of desserts from around the world includes everything from cookies to cakes, pies to tarts, and everything in between.